

Recently I wrote about calendar definitions. One of the topics discussed was tags and how useful they can be. Tags can also be applied to geospatial fields – this is something I’d consider best practice, as it promotes self-service. So, let’s take a look at the geo-tags which will benefit your Qlik implementation.
Firstly, it’s worth noting there are two main types of geometry data; point and polygon. A geopoint represents a single point on a map.
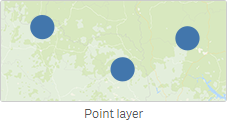
You can make a geopoint using the GeoMakePoint function, passing in the latitude and longitude parameters. For example:
GeoMakePoint([Latitude], [Longitude]) AS [Longitude_Latitude]
A polygon however, contains multiple points – representing an area on a map.
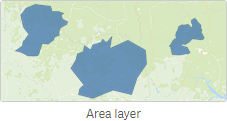
It is most common to create polygons in dedicated tools. I typically use Google Earth (because it’s free) and import the shape files created into Qlik Sense.
Once you have a geopoint or polygon field, the tagging can commence. There are two main benefits to tagging your geo-fields:
1. You can add a descriptive field to a map component and Qlik will automatically display the geometry data without the user having to specify the location data.
2. It also prevents users from using the geopoint field and therefore showing the latitude/longitude values in the labels.
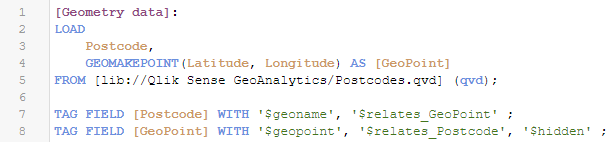
Below I have a simple load statement with a Postcode and GeoPoint field.

The postcode is the description I want to display in the map labels, when hovering over a point, and each postcode has a single GeoPoint.
Before we can start tagging, there are five tags you’ll need to know, these are:
1. $hidden
This tag is used to hide a field from the fields list. While the field can still be used as any other field, the user must type out the full field name and therefore know it exists in the application. This tag is occasionally used to hide the geopoint/polygon field, as they are often redundant after you have applied your tags. This is optional.
2. $geoname
Field values contain names of geographical locations, related to a point field ($geopoint) and/or an area field ($geopolygon).
3. $geopoint
Field values contain geometry point data.
4. $geopolygon
Field values contain geometry polygon data.
5.$relates
This links the tagged field to another. You will need to relate a $geoname field to a $geopoint/$geopolygon field, and vice versa. You must follow the $relates tag with an underscore and the linking field name. For example, if I was to link a geopoint field to a Postcode I would use the tag ‘$relates_Postcode’.
Now we know the tags required, let’s apply them to our LOAD statement above. A typical tag expression will follow a pattern similar to below:
TAG FIELD < field name > WITH < geo data type >, < relates_to >
Here is a full working example:
Once the application is reloaded the tagged fields will appear with the world icon, representing geometry data:
![]()
Now, when we add Postcode, or another $geoname field, the geopoint field we related is used automatically and the points display instantly – eliminating the efforts spent on defining the Location settings.
In conclusion, best practice states you should tag your geometry data, with the relevant meta-data, to further improve usability and efficiency when working with the map object. Should you require any training on Qlik Sense GeoAnalytics please get in touch and we can provide information on all our available courses.
By Christopher Lofthouse


.png)
Comments